wordpress迁移到81端口


wordpress原来工作在80端口,现在由于端口资源有限,80端口另有重用,需要迁移到81端口。
具体步骤如下:
1)在80端口下访问wordpress管理界面,在 设置->常规 页面
   更改 WordPress 安装地址 (URL) ,添加:81端口,比如原来是http://blog.retailsolution.cn 更改为http://blog.retailsolution.cn
   更改博客地址,添加:81端口;
2)由于原来曾使用过另外一个域名,是使用Domain Mirror插件实现多域名的,则在Domain Mirror的配置界面也要添加:81端口,比如原来有两个博客地址 http://syfr12.vicp.net/blog 需要更改为 http://blog.retailsolution.cn/blog

3)原有文章中如果有插图,则插图的URL地址要被更新,可使用如下语句进行更新:

UPDATE wp_posts SET post_content = REPLACE( post_content, “http://blog.retailsolution.cn“, “http://blog.retailsolution.cn” ) where post_date < “2009-02-01”

UPDATE wp_posts SET post_content = REPLACE( post_content, “http://syfr12.vicp.net“, “http://blog.retailsolution.cn” ) where post_date < “2009-02-01”

上述工作完成后,可使用端口映射,在:81上访问了

使用google自定义搜索引擎

mailman,google自定义搜索引擎,搜索站点,邮件列表

google搜索引擎很强大,如果没有机密信息的话,是否可以尝试让google来帮我们完成全站搜索引擎,而不必再自己去建立。

下文是个例子,用google自定义搜索引擎来搜索指定的邮件列表,具体步骤如下:


1)下载并安装sitemap生成器
参考:http://code.google.com/p/perlsitemapgenerator/

2)(可能需要)安装XML:SAX

$ perl -MCPAN -e shell
cpan> install XML::LibXML XML::SAX::Base XML::SAX::ExpatXS XML::SAX::Writer
cpan> quit

参考:http://www.ibm.com/developerworks/cn/xml/x-xmlperl2.html#resources

3)按要求修改comfig.xml ,另存为testlist_config.xml

   内容如下:

[root@retailsolution sitemap_gen_perl]# vi testlist_config.xml
 
&lt;?xml version=&quot;1.0&quot; encoding=&quot;UTF-8&quot;?&gt;
<!--
  sitemap_gen.pl example configuration script
 
  This file specifies a set of sample input parameters for the
  sitemap_gen.pl client.
 
  You should copy this file into "config.xml" and modify it for
  your server.
 
 
  ********************************************************* -->
 
 
<!-- ** MODIFY **
  The "site" node describes your basic web site.
 
  Required attributes:
    base_url   - the top-level URL of the site being mapped
    store_into - the webserver path to the desired output file.
                 This should end in '.xml' or '.xml.gz'
                 (the script will create this file)
 
  Optional attributes:
    verbose    - an integer from 0 (quiet) to 3 (noisy) for
                 how much diagnostic output the script gives
    suppress_search_engine_notify="1"
               - disables notifying search engines about the new map
                 (same as the "testing" command-line argument.)
    default_encoding
               - names a character encoding to use for URLs and
                 file paths.  (Example: "UTF-8")
-->
<site base_url="http://report.retailsolution.cn/mhonarchive/testlist/" store_into="/var/lib/mhonarc/archives/testlist/sitemap.xml" verbose="1">
 
  <!-- ********************************************************
          INPUTS
 
  All the various nodes in this section control where the script
  looks to find URLs.
 
  MODIFY or DELETE these entries as appropriate for your server.
  ********************************************************* -->
 
  <!-- ** MODIFY or DELETE **
    "url" nodes specify individual URLs to include in the map.
 
    Required attributes:
      href       - the URL
 
    Optional attributes:
      lastmod    - timestamp of last modification (ISO8601 format)
      changefreq - how often content at this URL is usually updated
      priority   - value 0.0 to 1.0 of relative importance in your site
  -->


  <!-- ** MODIFY or DELETE **
    "urllist" nodes name text files with lists of URLs.
    An example file "example_urllist.txt" is provided.
 
    Required attributes:
      path       - path to the file
 
    Optional attributes:
      encoding   - encoding of the file if not US-ASCII
  -->


  <!-- ** MODIFY or DELETE **
    "directory" nodes tell the script to walk the file system
    and include all files and directories in the Sitemap.
 
    Required attributes:
      path       - path to begin walking from
      url        - URL equivalent of that path
 
    Optional attributes:
      default_file - name of the index or default file for directory URLs
  -->
  <directory path="/var/lib/mhonarc/archives/testlist/" url="http://report.retailsolution.cn/mhonarchive/testlist/" />


  <!-- ** MODIFY or DELETE **
    "accesslog" nodes tell the script to scan webserver log files to
    extract URLs on your site.  Both Common Logfile Format (Apache's default
    logfile) and Extended Logfile Format (IIS's default logfile) can be read.
 
    Required attributes:
      path       - path to the file
 
    Optional attributes:
      encoding   - encoding of the file if not US-ASCII
  -->
 
 
  <!-- ** MODIFY or DELETE **
    "sitemap" nodes tell the script to scan other Sitemap files.  This can
    be useful to aggregate the results of multiple runs of this script into
    a single Sitemap.
 
    Required attributes:
      path       - path to the file
  -->
 
 
  <!-- ********************************************************
          FILTERS
 
  Filters specify wild-card patterns that the script compares
  against all URLs it finds.  Filters can be used to exclude
  certain URLs from your Sitemap, for instance if you have
  hidden content that you hope the search engines don't find.
 
  Filters can be either type="wildcard", which means standard
  path wildcards (* and ?) are used to compare against URLs,
  or type="regexp", which means regular expressions are used
  to compare.
 
  Filters are applied in the order specified in this file.
 
  An action="drop" filter causes exclusion of matching URLs.
  An action="pass" filter causes inclusion of matching URLs,
  shortcutting any other later filters that might also match.
  If no filter at all matches a URL, the URL will be included.
  Together you can build up fairly complex rules.
 
  The default action is "drop".
  The default type is "wildcard".
 
  You can MODIFY or DELETE these entries as appropriate for
  your site.  However, unlike above, the example entries in
  this section are not contrived and may be useful to you as
  they are.
  ********************************************************* -->
 
  <!-- Exclude URLs that end with a '~'   (IE: emacs backup files)      -->
  <filter action="drop" type="wildcard" pattern="*~" />
 
  <!-- Exclude URLs that is a picture gz bak file       -->
  <filter action="drop" type="wildcard" pattern="*jpg" />
  <filter action="drop" type="wildcard" pattern="*gif" />
  <filter action="drop" type="wildcard" pattern="*bmp" />
  <filter action="drop" type="wildcard" pattern="*gz" />
  <filter action="drop" type="wildcard" pattern="*bak" />
 
  <!-- Exclude URLs within UNIX-style hidden files or directories       -->
  <filter action="drop" type="regexp" pattern="/\.[^/]*" />
 
</site>


参考:http://code.google.com/p/perlsitemapgenerator/wiki/Create

4)测试

   perl sitemap_gen.pl –config=testlist_config.xml –testing

   参考:README

   没问题,一切OK

4) 运行

   perl sitemap_gen.pl –config=testlist_config.xml

   没问题,一切OK, 成功生成sitemap.xml 并且通知了google的搜索引擎。

5)用gmail帐号登录 google, 使用向导创建一个自定义搜索引擎

6) 自定义搜索引擎后,在我的帐户->网站管理员工具->选择一条你创建自定义搜索引擎时使用的网站地址

   ->SiteMaps

   在我的 SiteMaps处输入 sitemap.xml

   然后点击【提交SiteMap】  
7) 在我的帐户->我的搜索引擎->针对刚才创建的搜索引擎->控制面板->编制索引

   在 按需编入索引 下选择刚才提交的 sitemap.xml,然后【Index Now】

   完成后,google提示成功刷新了索引。

8) 在我的帐户->我的搜索引擎->针对刚才创建的搜索引擎->控制面板->预览  中

   输入一个你的邮件列表中的关键词,执行搜索,结果没有搜到。别灰心,你需要等待大约2个小时。

   2小时以后再执行搜索,发现已经能够搜索到指定的关键词了。

   到这里,自定义搜索引擎创建,测试成功。

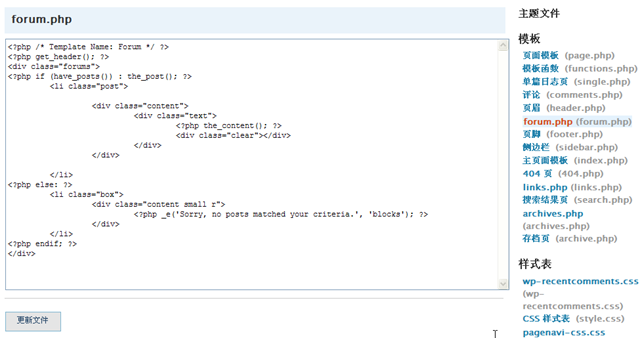
9)在我的帐户->我的搜索引擎->针对刚才创建的搜索引擎->控制面板->代码

   把 搜索框代码 下面的代码copy到要显示搜索框的网页中,比如邮件类表的索引页:threads.html中

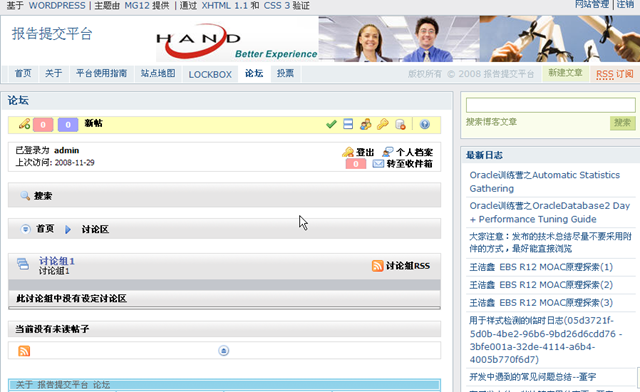
   现在当我们访问邮件列表归档的时候,就可以看到搜索框了:

http://report.retailsolution.cn/mhonarchive/testlist/threads.html

   试着这行一个搜索,确实是我们期望的结果。

10)使用 cron job 周期执行  perl sitemap_gen.pl –config=testlist_config.xml

    可参考:http://www.linuxsir.org/main/?q=node/209

11)我们还可以创建另一个自定义搜索引擎,把我们要搜索的内容全部整合到一起。

    11.1) 建立一个脚本文件,为其他maillist创建sitemap:gen_maillist_sitemap.sh 内容如下:

sitemap_gen_path=/d01/sitemap_gen_perl 
export sitemap_gen_path 
perl $sitemap_gen_path/sitemap_gen.pl --config=$sitemap_gen_path/testlist_config.xml 
perl $sitemap_gen_path/sitemap_gen.pl --config=$sitemap_gen_path/channelproject-commits_config.xml 
perl $sitemap_gen_path/sitemap_gen.pl --config=$sitemap_gen_path/datafix_config.xml 
perl $sitemap_gen_path/sitemap_gen.pl --config=$sitemap_gen_path/handtech_config.xml 
perl $sitemap_gen_path/sitemap_gen.pl --config=$sitemap_gen_path/report-maillist_config.xml

 
    chmod 744 gen_maillist_sitemap.sh

    11.2)把这个脚本放到crontab 每天定时运行

    cd /etc

    cp crontab crontab.bak

    vi crontab ,  添加:

    02 4 * * * root /d01/sitemap_gen_perl/gen_maillist_sitemap.sh

    #每天 4时2分运行这个脚本

    #重启crond 服务

    service crond restart

    11.3) 建立一个自定义搜索引擎,把上述sitemap都包括进去。同时把属于retailsolution.cn域上的其他站点的sitemap也包括进去。

    这样可以形成一个对retailsolution.cn全域的搜索引擎

比如这个搜索引擎就可以搜索retaisolution.cn上的 report.retailsolution.cn,blog.retailsolution.cn,all maillist 
   

<!-- Google Customer serch engine begin -->
<form id="cse-search-box" action="http://www.google.com/cse">
  <div>
    <input type="hidden" value="016037023302352540634:y7c8yn6q_ra" name="cx" />
    <input type="hidden" value="UTF-8" name="ie" />
    <input style="border-right: #7e9db9 1px solid; padding-right: 2px; border-top: #7e9db9 1px solid; padding-left: 2px; background: url(http://www.google.com/coop/intl/zh-Hans/images/google_custom_search_watermark.gif) #ffffff no-repeat left 50%; padding-bottom: 2px; border-left: #7e9db9 1px solid; padding-top: 2px; border-bottom: #7e9db9 1px solid" size="31" name="q" />
    <input type="submit" value="搜索" name="sa" />
  </div>
</form>
 
<script src="http://www.google.com/coop/cse/brand?form=cse-search-box&amp;lang=zh-Hans" type="text/javascript"></script>
<!-- Google Customer serch engine End -->

完。


Issue:

Issue1: google自定义搜索引擎的不足,

主要有:       
    1) 索引的建立不稳定,或者说延迟太厉害,经验感受下:          
       1.1 testlist邮件列表的sitemap提交给googl后,第一次是在半小时后能看到效果。 第二次添加一篇文章 ,里面含有"测试GB2312” 这个字符串,我看到google控制台上已经显示该sitemap.xml对应的文章数增加了,我针对这个sitemap 运行了"index Now" 然后过了半小时去搜索"测试GB2312” 依然是没有结果。3小时以后才看到了期望的结果。经过多次试验发现一般在运行"Index Now"以后3小时可完成sitemap中URL对应页面的索引.           
       1.2 report-maillist邮件列表中有很多页面,其sitemap已经在1天前提交给google,由于当时没有点"Index Now",今天在自定义搜索引擎中搜索其中包含的关键词时,还是搜索不到,说明google未曾给它做索引。难道是说如果提交了某个sitemap,而没有手动"Index Now"的话,就不知道google要隔多久才会主动来抓取sitemap中的网页并建立索引了?。

     这个问题其实很严重,因为你跟普通用户去解释全文搜索需要隔N个小时才起作用,很难解释得通,所以,如果使用google自定义搜索引擎作为企业级的正式搜索引擎,可能不妥,因为在用户看来它显得不可靠,但作为一个备用搜索引擎还是可以的。或者作为一个个人站点的邮件列表的搜索引擎也还勉强凑活。

     如果要使用google自定义索引,建议能些个脚本自动为每个sitemap定期运行"Index Now" ,分析"Index Now"页面的源码可以看到其执行的http请求。我们也可以自己执行这些请求,可以为多个sitemap执行"Index Now"


http://www.google.com/coop/manage/cse/index?cx=016037023302352540634:y7c8yn6q_ra&amp;hl=zh-CN&amp;sig=__4TuuBdvPw7mRe-F4gl4lRNM-56w=&amp;qauth=kcmf3TVXwKibiK2x&amp;qinfo=zvq2LnMpaIo&amp;sitemap=http://report.retailsolution.cn/mhonarchive/testlist/sitemap.xml.gz
http://www.google.com/coop/manage/cse/index?cx=016037023302352540634:y7c8yn6q_ra&amp;hl=zh-CN&amp;sig=__4TuuBdvPw7mRe-F4gl4lRNM-56w=&amp;qauth=kcmf3TVXwKibiK2x&amp;qinfo=zvq2LnMpaIo&amp;sitemap=http://report.retailsolution.cn/mhonarchive/datafix/sitemap.xml.gz
http://www.google.com/coop/manage/cse/index?cx=016037023302352540634:y7c8yn6q_ra&amp;hl=zh-CN&amp;sig=__4TuuBdvPw7mRe-F4gl4lRNM-56w=&amp;qauth=kcmf3TVXwKibiK2x&amp;qinfo=zvq2LnMpaIo&amp;sitemap=http://report.retailsolution.cn/mhonarchive/handtech/sitemap.xml.gz
http://www.google.com/coop/manage/cse/index?cx=016037023302352540634:y7c8yn6q_ra&amp;hl=zh-CN&amp;sig=__4TuuBdvPw7mRe-F4gl4lRNM-56w=&amp;qauth=kcmf3TVXwKibiK2x&amp;qinfo=zvq2LnMpaIo&amp;sitemap=http://report.retailsolution.cn/mhonarchive/report-maillist/sitemap.xml.gz
http://www.google.com/coop/manage/cse/index?cx=016037023302352540634:y7c8yn6q_ra&amp;hl=zh-CN&amp;sig=__4TuuBdvPw7mRe-F4gl4lRNM-56w=&amp;qauth=kcmf3TVXwKibiK2x&amp;qinfo=zvq2LnMpaIo&amp;sitemap=http://report.retailsolution.cn/mhonarchive/channelproject-commits/sitemap.xml.gz

Over 

不过可惜,这些请求不能直接执行,需要登录。不过在google文档中提供了login的API的。文档参考:我的帐户->我的搜索引擎->文档->开发人员指南。有时间的时候可以继续研究。

      google帐户,有不同级别,不同级别的帐户在使用Index Now功能的时候有不同的限制,一般的帐户提交"Index Now"不管你的SiteMap中有多少条URL,google只会为其中级别最高(如果级别都一样,就是最后更新的)的10个页面建立索引。级别高的帐户可以一次获得更多数量的页面索引,此外"Index Now" 针对一个CSE限制只能一天执行一次(不过你有多少个SiteMap); 这个一天执行一次是官方说法,实际上可以做到每隔1小时执行一次。如果写程序来执行"Index Now"需要试验,因为Google的标准Service API中没有明确支持通过程序执行"Index Now"

            2009-01-31 经过多次测试发现,如果没有手动"Index Now" ,在提交了SiteMap以后经过3天也没有被Google Index进去,真是郁闷,我们总部能每天手动去"Index Now"吧,唉,即使手动去"Index Now" ,Google还做了上面的很多限制,你要靠Google来对你的站点进行全文检索?天大的笑话,真是幼稚。

           看来,即便是一个个人站点的搜索引擎也不能靠Google, 得另寻出路。网上有关于全文检索引擎的资料,下一步研究方向:1、Oracle 商业搜索引擎,2、开源搜索引擎。 对于开源搜索引擎,首先研究:Lucene , 可参考:http://www.chedong.com/tech/lucene.html

mailman 集成 MHonArc 操作指南

mailman 集成 MHonArc 操作指南

mailman 内置的邮件归档程序pipmail ,不能处理mime类型邮件, 一个图文并茂的邮件 ,会被拆分成多个图片,html的邮件也会另存为一个附件。阅读很不方便。那么如何改善呢? 一般建议使用其他的邮件归档程序和mailman集成,下文描述mailman集成MHonArc的步骤:


–1)下载并安装MHonArc-2.6.16-1.noarch.rpm
—  请参考: http://www.mhonarc.org/#support
—  下载def-mime.mrc 作为默认的resource 文件
—  请参考:http://www.mhonarc.org/MHonArc/doc/rcfileexs/def-mime.mrc.html

–2)配置mailman 使用MHonArc
—  请参考:http://www.mhonarc.org/archive/html/mhonarc-users/2001-10/msg00021.html
—  在/etc/mailman/mm_cfg.py 中添加:
PUBLIC_ARCHIVE_URL  = ‘/mhonarchive/%(listname)s’
PRIVATE_ARCHIVE_URL  = ‘/mhonarchive/%(listname)s’
PUBLIC_EXTERNAL_ARCHIVER = ‘/usr/bin/mhonarc -rcfile /etc/mailman/def-mime.mrc -add -outdir /var/lib/mhonarc/archives/%(listname)s > /dev/null’
PRIVATE_EXTERNAL_ARCHIVER = ‘/usr/bin/mhonarc -rcfile /etc/mailman/def-mime.mrc -add -outdir /var/lib/mhonarc/archives/%(listname)s > /dev/null’

–3)配置httpd.conf
vi /etc/httpd/conf/httpd.conf
–找到 Alias /icons/ 在下面添加:
Alias /mhonarchive/ “/var/lib/mhonarc/archives/”
<Directory “/var/lib/mhonarc/archives/”>
    Options -Indexes MultiViews
    AllowOverride None
    Order allow,deny
    Allow from all
</Directory>

–4)建立列表目录
cd /var/lib
mkdir /mhonarc
chown root:mailman mhonarc
cd mhonarc
mkdir archives
chown root:mailman archives
cd archives

mkdir testlist
chown root:mailman testlist
chmod 775 testlist

–所有需要 mhonarc 归档的列表,都需要手动建立对应的目录,改变目录的group,写权限.
–当新建一个mailman 列表时,系统还是会在默认的归档目录中自动建立对应的列表目录,
–但不会在EXTERNAL_ARCHIVER 指定的目录中自动建立对应的列表目录.所以很遗憾,需要手动建立.

–5)重启Apache
service httpd restart

–6)初始化转换
prefix=/var/lib/mailman
export prefix
mhonarc -mbox $prefix/archives/private/testlist.mbox/testlist.mbox -outdir /var/lib/mhonarc/archives/testlist -rcfile /etc/mailman/def-mime.mrc

— 转换后在/var/lib/mhonarc/archives/testlist目录下后会产生一个.mhonarc.db 文件,该文件是def-mime.mrc 模板必须的,要使得mailman 对 此文件有读权限。
— 否则mhonarc运行会报错,归档失败,但不影响邮件发送。要避免这个问题可以如下更改:
chown root:mailman .mhonarc.db

把目录的读写权限设置为:755

chmod 755 /var/lib/mhonarc/archives/testlist

把目录的所有者更改为:root:mailman

chown  root:mailman /var/lib/mhonarc/archives/testlist


–所有需要 mhonarc 归档的列表,都需要初始化转化一下.

–7)重启mailman
service mailman restart

–8)问题
    8.1) 从web访问归档时,提示Forbidden ,不允许访问,怎么办?
         答:原因是mailman 使用mhonarc 转换邮件为html的时候, 写文件时, 只有owner和group的读权限,没有other的读权限,所以无法访问.
            最简单的方法就是把 apache用户放入到mailman 用户组下去.
            比如: usermod -G apache,mailman,cvs_project apache
            加入后,需要重启apache.
    8.2) 从web访问归档时, 显示的是目录,而不是默认的归档列表页. 怎么办?
         答: 使用mhonarc 产生的索引文件名是:threads.html 和maillist.html 没有index.html 所以没有显示默认页面.
            最简单的方法,在httpd.conf  中 DirectoryIndex 参数添加 threads.html  
            DirectoryIndex index.html index.html.var threads.html 
            加入后,需要重启apache.
    8.3) 我发现gforge 集成mailman,由Gforge创建的maillist 不受上述改动的影响
         答: 是这样的,在gforge的httpd.conf中,对mailman 别名有自己的定义. 这个问题在有时间的时候可以继续研究.
    8.4) 如果哪天我不想使用mhonarc来归档了,还是恢复到pipmail来归档,那么会有什么问题么?
         答: mailman的逻辑是,先归档到默认的地方,然后查看是否有外部归档程序,如果有,再交给外部归档程序继续归档.所以原始归档总是存在的.
             没有什么问题.
    8.5) 从web访问归档时, 发现来自post-notification的html模版的邮件中的中文是乱码,但是outlook发过来的是正常的.怎么解决?
         答: 在gmail中查原始文件,发现字符集不对,只需要修改post-notification的html 的email模版就可以了.把字符集改成UTF-8.

–9)其他Mailman相关问题

    9.1)如果我原来使用80端口,后来使用:81作为web端口,如何更改以前的列表使得其中的所有链接都带有:81?

          答:按照下面的做法即可实现:

                进入 mailman 目录(一般是/usr/lib/mailman),在其中新建一個文件 (取名为 webdata 好了),內容为:
                web_page_url = ‘http://gforge.retailsolution.cn:81/mailman’
                然后使用
               $ bin/config_list -i webdata yourlist
               命令,你就会得到
               Non-standard property restored: web_page_url
               这就是成功了。

               查看你的管理页面,就会发现里面的链接都已经指向新的域名了。

给WordPress文章添加关于作者和评价功能

给WordPress文章添加关于作者和评价功能

IBM的知识库上所有文章的最后都有”关于作者” 和 “对本文的评价”功能. 那么wordpress的文章如何实现呢?


一、“关于作者”显示作者头像,所以需要一个作者头像插件,可以让每个作者上传自己的头像照片.

       这可以使用 User photo 插件来实现,插件下载地址:http://wordpress.org/extend/plugins/user-photo/

       安装插件:按照通常的方法安装,这里就不多说了。

二、“对本文的评价”需要对文章评价,所以需要一个评分插件,这可以使用WP-PostRatings 插件来实现,插件下载地址:
       http://lesterchan.net/portfolio/programming/php/

      安装插件:按照通常的方法安装,这里就不多说了。

三、更改当前主题下的single.php, 找到这段内容:

        <div class=”content”>
            <div class=”text”>
                <?php the_content(); ?>
                <div class=”clear”></div>
            </div>
         </div>

        在其下面添加如下内容:


<div class="content">
  <div class="text">  
    <div class="clear"></div>
    <div class="clear"></div>
    <p></p>
    <p></p>
    <h4>关于作者: </h4>
    <p></p>
    <table><tbody><tr><td><?php if(function_exists('userphoto_the_author_thumbnail')) { userphoto_the_author_thumbnail(); } ?></td><td>昵称:<?php the_author_nickname(); ?><br>档案信息:<?php the_author_description(); ?><br>联系方式:你可以通过<a href="mailto:&lt;?php the_author_email(); ?&gt;"><?php the_author_email(); ?></a>联系作者<br>点击查看<?php the_author_posts_link(); ?>发表过的所有文章...</td></tr></tbody></table>
   <p></p>
   <p></p>
   <h4>对本文的评价: </h4>
   <p></p>
   <?php if(function_exists('the_ratings')) { the_ratings(); } ?>
   <p></p>
  </div>
</div>

N

四、更改当前主题下的index.php, 找到:

      <h3 class=”title”><a href=”<?php the_permalink() ?>” rel=”bookmark”><?php the_title(); ?></a>

      在其后面添加:<?php if(function_exists(‘the_ratings’)) { the_ratings(); } ?>

     (备注:我这里针对的是blocks主题,其他的主题查找的字符串可能有所不同)

五、查看效果:

      点击进入某篇文章,我们在文章末尾看到效果如下:

     image

论坛功能说明

本站的论坛功能说明,关于日志和论坛主题的集成。

论坛功能已经添加好了,我已经建了一个讨论区:性能优化。

这个论坛和日志能够集成在一起。

在编辑日志的时候,在下面的[连接到论坛] 处 ,在“创建主题”前打勾,然后保存,那么这篇日志就成为论坛中的一个新的主题了(当然你也可以直接到论坛中新建主题)

比如我们把“Oracle训练营之Automatic Statistics Gathering ” 这篇日志编辑一下,按照上面的做法操作:

clip_image002

完成后,我们就可以在论坛中看到这个主题了:

http://report.retailsolution.cn/forum/performance-tunning/oracleautomatic-statistics-gathering/page-1

clip_image004

讨论问题时,可以直接在这个论坛中回贴。 而在日志页面上,系统也自动加上了该日志对应的论坛主题的连接,如下图:

clip_image006

大家可以从这个连接点进论坛进行讨论.

wordpress 配置spf 论坛 & Blocks主题下的全宽显示

wordpress 配置spf 论坛 & Blocks主题下的全宽显示


一、安装插件: Simple:Press Forum 3.1.4
下载地址:http://www.stuff.yellowswordfish.com/simplepress-forum/simplepress-forum-download/

(备注: 先安装3.1.3 ,然后打补丁3.1.4, 这个补丁一定要打,否则在wp2.6上无法更改论坛使用的Page的永久连接的名称)

安装插件很简单,就是按照通常的方法进行即可,安装补丁就是把3.1.4补丁包解压缩后,把升级包中的文件覆盖原来相应目录下的文件即可,这个在补丁包中的说明文件中有提示.

下载中文语言包:http://www.stuff.yellowswordfish.com/simplepress-forum/simplepress-forum-languages/

把sforum-zh_CN.mo 上传到 $wp-content/plugins/simple-forum/languages 目录下。


二、安装程序:

插件安装后,进入wp的后台管理界面,可以看到多了一个[论坛]Tab页,进入后,系统提示你进行安装,按要求进行即可。

三、配置界面:

这里只讲最重要的一步,就是论坛插件安装完后会自动生成一个已经发布的页面,该页面的永久连接别名是forum. 需要在编辑页面的地方查询到这个页面的id ,然后在论坛配置界面更新:

image    

更新后,还需要在[工具箱]Tab页,点[更新论坛永久连接]:

image

四、针对Blocks主题的论坛页面全宽设置

经过上述步骤,就已经可以在首页的[论坛]Tab页中看到论坛内容了。但次时的论坛和普通页面看起来一样,感觉有点不像论坛:

image

一般论坛都要全宽显示的,不能有右边的侧边栏。网上也有一些文章讲如何作到论坛全宽的文章,但是针对不同的主题,做法还是有区别的,无法照搬全套。 我们这里介绍的是针对Blocks主题的做法:

4.1) 编辑当前主题目录下的style.css,添加如下选区的内容:

image

4.2) 在当前主题目录下增加一个forum.php文件,内容如下:

image


4.3) 编辑forum页面,在页面模板处选择:Forum ,然后保存

image

4.5) 我们再来看论坛,已经全宽显示了:

image

wordpress 迁移日志

wordpress 迁移

一、
=============================
源机器动作:
=============================

1) 停止http服务
   service httpd stop
  
2) 打包wordpress目录
   tar -zcvf wp2.6_cn.20081116.zip /d01/wordpress
  
3) 停止mysql服务
   service mysqld stop
  
4) 打包wordpress数据库
   tar -zcvf mysqldata_wordpress_20081116.zip /var/lib/mysql/wordpress
  
5) 传输 wp2.6_cn.20081116.zip,mysqldata_wordpress_20081116.zip 到新的机器上根目录下
==============================
目标机器动作:
==============================
6) 启动mysql服务
   service mysqld start
7) 执行解压缩
   tar -zxvf wp2.6_cn.20081116.zip
   cd /var/lib/mysql/
   mkdir wordpress
   cd /
   tar -zxvf mysqldata_wordpress_20081116.zip
8)#更改 httpd.conf
   #在 最下面 添加: Alias /blog/ “/d01/wordpress/”
   cd /etc/httpd/conf
   vi httpd.conf
   #添加内容:
# alias for wordpress
Alias /blog/ “/d01/wordpress/”

9) 添加虚拟主机
   vi httpd.conf
   #去掉如下内容前的注释,并作适当更改
NameVirtualHost *:80

<VirtualHost *:80>
    ServerAdmin webmaster@dummy-syfr12.vicp.net
    DocumentRoot /d01/wordpress/
    ServerName syfr12.vicp.net
    ErrorLog logs/syfr12.vicp.net-error_log
    CustomLog logs/syfr12.vicp.net-access_log common
</VirtualHost>
<VirtualHost *:80>
    ServerAdmin webmaster@blog.retailsolution.cn
    DocumentRoot /d01/wordpress/
    ServerName blog.retailsolution.cn
    ErrorLog logs/blog.retailsolution.cn-error_log
    CustomLog logs/blog.retailsolution.cn-access_log common
</VirtualHost>

   #更改hosts
   vi /etc/hosts
   #添加如下内容
   192.188.8.50    syfr12.vicp.net syfr12
   192.188.8.50    blog.retailsolution.cn blog
  
10) 重启httpd  

11) http://blog.retailsolution.cn/blog 登录wordpress
    进入管理界面,对插件 Domain Mirror进行设置
    添加一个domain:
    >Domain: blog.retailsolution.cn
    >Wordpress address (URL): http://blog.retailsolution.cn
    >Blog address (URL): http://blog.retailsolution.cn
   
    这样:通过http://blog.retailsolution.cn/bloghttp://http://blog.retailsolution.cn 都能访问此博客了。 
   
####
备注:
1)重启动主机后,vmware启动报错:Could not open /dev/vmmon: No such file or directory.
  解决:再运行一遍:/usr/bin/vmware-config.pl
  启动vmware: /usr/bin/vmware
2)如何更改IP地址?
假设要更改IP地址从 192.188.8.50->192.168.1.50
1) 通过 系统->管理->网络
   更改IP ; 网关 ;主DNS;主机
2) service network restart

3) vi /etc/inittab
   修改第一行 id:5:initdefault: 更改为 id:3:initdefault:
   reboot
4) 启动另外两个服务:
   service mysqld start
   /etc/init.d/mailman start
  
5) 停掉一些不必要的服务
   service yum-updatesd stop
 
  
6) 更改路有器上的虚拟服务器设置,使之指向新的IP

7) mysql数据库是从4.1.20 迁移到 5.0.22 的;迁移后发现发表文章或者更改文章速度较慢(约1分钟),怀疑是与此有关。
   采用导出/导入的方式再试一下:
   在源机器上导出:
   mysqldump -uroot -psyfsql wordpress > /d01/wordpress20081117.sql
   在目标机器上导入:
   mysql -uroot -psyfsql blog < /d01/wordpress20081117.sql
   在目标机器上更改 wp-config.php:
   cd /d01/wordpress
   vi wp-config.php
   #更改数据库为blog
  
   #再测试,发现发表文章或者更改文章速度和原来一样,没有改进,看来不是这个问题。
   #发现慢的主要原因是php在调用mysql之前等待了较长时间。WP-comments-post.php也比较慢
   #查看/etc/php.ini 发现 log_errors=on
   #于是去掉error_log = file前的注释,更改为:
   error_log = /tmp/php.log ;重启apache后运行几个页面也没产生php.log,这说明一般情况下,不产生log,因此没有影响。
   #怀疑是虚拟机硬盘碎片问题,于是删除了虚拟机上2G的临时文件,然后运行defreg,并设置虚拟机硬盘的advanced->independent 设置为persitent
   #再试验,改善不大,即们没有改善,因此也不是这个原因。
   #再比较同一台机器上两个blog站点的差别,发现新建立的站点保存一片文章只需要20秒,但是迁移过来的blog.retailsolution.cn需要1分钟
   #两者的差别是blog.retailsolution.cn的数据量大一点。两个站点使用插件是一样的。因此怀疑是update SQL的性能问题。但我导入整个站点的数据也不过几十秒而已,所以也不是这个原因.
   #又做了一个试验发现,其实保存时很快的:新建一片文章,点发布。马上发布按钮就恢复了知识,post?action=edit页面还在等待。。;但立刻到主页上去刷新发现新建的文章已经看到了,点进去内容也是全的。这个过程是很快的,基本没有延迟。
   #所以结论是:mysql的性能没有问题,问题出在post.php 本身的等待上。
   #尝试在 httpd.conf中设置keepAlive on ;结果没有改善;还是恢复设置.
   #如果想结束等待,在确认已经保存OK的情况下(另开个IE Tab页,在主页上的最新日志已经看到这篇文章),直接按F5就可以了。
   #登录mysql
   mysql> show variables;
   可以查看当前数据库参数。观察下来基本上默认的配置是 my-medium.cnf 中配置的一半。但比my-small.cnf 中的要大很多。
   #my-large.cnf 是按照mysql要求500M内存设计的。
   #cp /etc/my.cnf /etc/my.cnf.bak
   #cp /usr/share/doc/mysql-server-5.0.22/my-large.cnf /etc/my.cnf
   #后来有一天,把report站点的feedsky插件禁用, 并起用oray 的专业服务后 后发现保存响应速度很快.


8) 对同一页面不停的按F5刷新,发现后台CPU上升很快,要达到60%;而以前使用了wp-supper-cache以后只是达到10%
   重装了wp-supper-cache依然无效,后台观察cache的页面数量为0;郁闷。。。
   #同时开三个页面对主页连续F5刷新,每个页面连续刷新20次;再打开一个窗口访问主页,出现无响应的情况
   #去掉wp-postviews插件;情况就大大改观了。同上面一样的测试,再打开一个窗口访问主页,依然可以得到响应。
   #目前的测试结果是:同时承受30个并发请求的情况,再来个请求的响应时间是30秒。对于wordpress不建议使用很多花哨的插件。除非必要,越简单越好。
  
  
=========================================
创建另一个站点:
报告平台:
1) 创建mysql数据库:report
2) 上传wp2.6.2中文版到 /d01/report 目录
3) 更改/d01/report/wp-config.php
4) 更改/etc/httpd/conf/httpd.conf
   4.1#增加虚拟站点
<VirtualHost *:80>
    ServerAdmin webmaster@report.retailsolution.cn
    DocumentRoot /d01/report/
    ServerName report.retailsolution.cn
    ErrorLog logs/report.retailsolution.cn-error_log
    CustomLog logs/report.retailsolution.cn-access_log common
</VirtualHost>
   4.2#增加别名:并开放该目录的rewrite模式
# alias for wordpress

Alias /report/ “/d01/report/”
<Directory “/d01/report”>
    AllowOverride all
</Directory>
  
   4.3 启用Apache磁盘和内存的缓存
   # enable disk cache

<IfModule mod_cache.c>
   #LoadModule disk_cache_module modules/mod_disk_cache.so
   <IfModule mod_disk_cache.c>
     CacheEnable disk /
     CacheRoot /tmp/apacheCache
     CacheMaxFileSize 64000
     CacheMinFileSize 64
     CacheDirLevels 5
     CacheDirLength 3
   </IfModule>

   #LoadModule mem_cache_module modules/mod_mem_cache.so
   <IfModule mod_mem_cache.c>
     CacheEnable mem /
     MCacheSize 4096
     MCacheMaxObjectCount 100
     MCacheMinObjectSize 1
     MCacheMaxObjectSize 2048
   </IfModule>
</IfModule>
  
  
   #重启http服务
   service httpd restart
5) 更改/etc/hosts
   添加:
   192.188.8.50    report.retailsolution.cn report
  
6) 登录域名运营商网站,添加子域名:report 然后启动该子域名的动态解析。

7) 重新启动:/usr/local/phlinux  
     
8) http://retailsolution.cn/report/wp-admin/install.php
   按照向导步骤进行。。。
  
9)完成后 Admin 登录后台管理,在设置->常规中改变
   http://retailsolution.cn/report ->http://report.retailsolution.cn
   这样,就可以通过http://report.retailsolution.cn 来访问本站点了。
   注意:即使改变admin的密码为容易记忆的密码,以免遗忘。
  
10)安装常规插件
    domain-mirror.1.1.zip
    feedsky-ping.1.1.zip
    feedsky-ping.php   
    google_sitemap_2.7.1_zh_CN.rar
    lightbox-2.2.8.0.zip
    mg-advancedoptions.1.4.zip
    qmr21.zip
    search-unleashed.zip
    sem-external-links.zip
    sitemap-generator.zip
    subscribe-to-comments-zh_CN.mo
    subscribe-to-comments.zip
    swift-smtp.1.0.zip
    wordpress-thread-comment.1.4.8.1.zip
    wp-codebox.zip
    wp-postviews.1.31.zip
    wp-sticky.1.31.zip
    wp-super-cache.0.8.4.zip

   
11) 安装主题
    xeiro.1.1.zip
    blocks.1.4.10.zip

WORDPRESS 安装日志

/****************************************************************************
======                                                                             
======                Copy Right 2008-2009 Reserved         
======                WORDPRESS 安装日志                           
–Created by       :  yunfang.shang@hand-china.com
–Creation Date    :  2008-10-1
–Version          :  1.0 
======                Update History                        
–2008-10-1  version 1.0  created

**********************************************************************/
1\ 安装vmware for linux
   上传VMware-workstation-5.5.1-19175.tar.gz 到/d01
   解压缩
   cd /d01/vmware-distrib
   ./vmware-install.pl  
   提示配置参数时,全部使用默认值.
  
  
2\ 在vmware 上安装 linux RHEL 4.6
   不多说了,一般人都会。
   安装完后注意安装一下vmware-tools
   (备注:实验证明host=Windows下的虚拟机创建的vmdk 在host=linux 下的虚拟机同样可用,所以linux可以不用重新安装直接拷贝一个vmdk过来就可以了)
  
3\ 安装mysql + Php + Apache

   安装linux 的时候可以选择 WebServer (PHP+Apache) 和 mysql  这样就不用单独安装。
   如果以前没有安装也可以在添加/删除程序中在安装。
   如果要安装最新的版本(一般linux中附带的都不是最新版本),请先卸载老版本,再下载新的安装文件安装。
   wordpress要求的mysql + apache + php版本并不高,Redhat Enterprise server 4.6完全可以满足。所以不用再单独安装更新的版本。
  
4\ 安装wordpress

   启动mysql server
   启动httpd
   #有关mysql的操作指南请参考:mysql_cn_sc.chm
   #创建一个mysql 的db
   /usr/bin/mysql -uroot -p
   mysql> show databases;
   mysql> create database wordpress;
   mysql> quit;
   #更改mysql 的root用户的密码为XXXXX

   /usr/bin/mysqladmin -uroot -p password XXXXX
   

   #上传WordPress.v2.6.2.Incl.Simp.Chinese.Pack.v2.1-wpcng.zip 到/d01
   cd /d01
   unzip WordPress.v2.6.2.Incl.Simp.Chinese.Pack.v2.1-wpcng.zip
   cd /d01/wordpress
   
   #按要求更改配置文件内容
   vi wp-config.php
   #查看apatch 的配置   
   #更改 httpd.conf
   #添加 Alias /blog/ “/d01/wordpress/”
   cd /etc/httpd/conf
   vi httpd.conf
   #安装
   #在路由器中做好端口Mapping
   http://blog.retailsolution.cn/blog/wp-admin/install.php
   输入标题和Email即可完成安装。
   安装后的发布查看页面是http://blog.retailsolution.cn/blog/
   管理页面是:http://blog.retailsolution.cn/blog/wp-admin